Showing posts with label Clothes. Show all posts

Monday, February 20, 2012

Tiered Ruffle Skirt

Pin It

My daughter turned two this last week.  For one of her birthday presents, I made her this cute tiered ruffle skirt.  While it took a little bit to make, it wasn't that difficult.  I used this tutorial by a girl and a glue gun you should definitely make one for yourself, your daughter, your niece or anyone else you can think of.  I seriously love it!


Wednesday, September 28, 2011

Amazing Walmart Clearance Sale!

Pin It Today I went to the Orem, Utah Walmart and they were having a huge clearance sale on their girls summer clothes. 
How much did I pay for all of these clothes you ask....$12!!!  That's right!  They are selling these adorable outfits for $1 each!  And the shirts on the top came in sets of 2 for $1.  Sure, I went all out....but now I'm ready for next summer!  Check out your local Walmart to see if they are having the same deal.  It's seriously amazing!

Sunday, September 25, 2011

Maternity Band

Pin It With my ever expanding waistline, I've been considering getting a bella band since I've heard such great things.  However, I found a great tutorial on Make it and Love it on how to make your own maternity band.  I made one for myself and will definitely by making some more.  When I make my next one, I'm going to make it longer than her dimensions and also not as wide.  Every body is different so you can measure and see what will work for you. 

Monday, September 19, 2011

Little Boy Tie Tutorial

Pin It
Last week I learned how to make little boy ties and thought I'd share what I learned.  They are so easy and so cute!  Plus, it's one of the few crafts I can make for my little guy on the way.  I hope my step by step tutorial helps you out.  These are probably the size you'd want for a 1 1/2 - 2 year old.  If you want to make them for an older child, just make the pattern longer.  If you have any questions please ask!

Using the pattern found here, cut out your fabric.  You will need to cut two layers of fabric - one being the pattern you want to show for your tie and the other being a backing (this one will only show on the little corners in the back).

Put the right sides together and sew the corners together using a 1/4" seam allowance.
 Clip the fabric on the corners - making sure not to cut the actual seam.
 Flip the fabric right side out and iron the corners so they are nice and sharp.
 Fold the tie in half with right tie pattern sides together and sew down the edge.  Once again using the 1/4" seam allowance.  DON'T sew the corner ends, only the long edge.
 Press the seam open and then using a safety pin, flip the tie right side out again.  You do this by putting the safety pin on the corner and then feeding it down the hole on that same side.
Press your tie again so it's edges are nice and sharp.
 This is what the back of the tie looks like.
Cut a piece of fabric that is approximately 2 3/4" wide and 16" long.  Feel free to make this strip longer or shorter if you need to.  This is what will be going around the neck.  Put the right sides together and sew a straight line using a 1/4" seam allowance.
 Flip it right side out (again with the safety pin) and then press your fabric. with the seam being in the middle.
 Sew the ends shut - if you are wanting to do elastic for part of your neck piece, simply put it about 1/2" into the end and then sew your fabric shut.
 
 How to Tie the Tie

Place your tie like this around the neck piece.
Bring the back of the tie across the front.
 Pull the back piece up high so if looks like a normal tie not and then wrap it around to the back. (Look at the images - it will help a lot ha).
 Tuck the back of the tie through the front.
 Now move that little piece that is sticking out of the front to the back.  You just have to slide it around.  Tighten the knot by pulling on the neck piece. Using a needle and thread, stitch the little back piece to the second layer of the front piece, but only through that layer so it won't be seen from the front.  This will keep it from getting untied.
 And here is your tied tie.
 All you do after this step is add Velcro or snaps to the neck piece or whatever else you are wanting for your attachment. 

These are some ties I made for my little guy this weekend.  Aren't they so cute???

This are super easy to make and use very little fabric.  I would recommend getting about 1/4 of a yard - and you will definitely have some extra fabric with that.  You could maybe get by with 1/8 yard, but it would be close.

If you'd like to see my new tutorial on how to make clip-on bow ties go HERE


Friday, September 9, 2011

Old Dress to Children's Dress

Pin It I'm finally starting to get my crafting back on....if you hadn't noticed I've been a bit more interested in food than crafting.  Does it surprise you that we found out I'm having a baby BOY?!?!?!  I think that explains my lack of craftiness :) 

Yesterday I made a dress for my little girl out of an old dress of mine.  I should have done a step by step tutorial, but I didn't (I was trying to hurry and make it during her nap time).  If you have any questions, I'm happy to answer them though. 

Here is the original dress.  For a reference, it came down to my knees.  Why did I cut it up and ruin it you ask?  Honestly, it never fit well and the top was too wide.
 Here is the dress I made for my daughter.  It's a bit too long (remember she was down for a nap so I couldn't take measurements along the way), but I still like it.  I have a bit more fabric left over that I think I'll make a matching headband with. 

Friday, April 15, 2011

Easter Dress From A Shirt

Pin It
My mom was cleaning out her closet when she saw a shirt that she thought I would like to revamp into something for my daughter.  I'm so glad she saved it!  I've been holding onto it for a couple of months since I thought it would make the cutest little spring dress.  My family has a tradition of getting an Easter dress each year.  Rather than buying one for for my daughter, I decided to use my mom's old shirt.  Here's what I did:
This is what the shirt used to look like (I started to cut it up and then realized I hadn't taken a picture of it yet, so I put it back together for this shot ha)

Here are the different pieces I cut the shirt into.  I had to unpick the little pleats that were on the front of the shirt.  I sewed the two large pieces together on one side. 
 I and wound my bobbin with elastic thread.
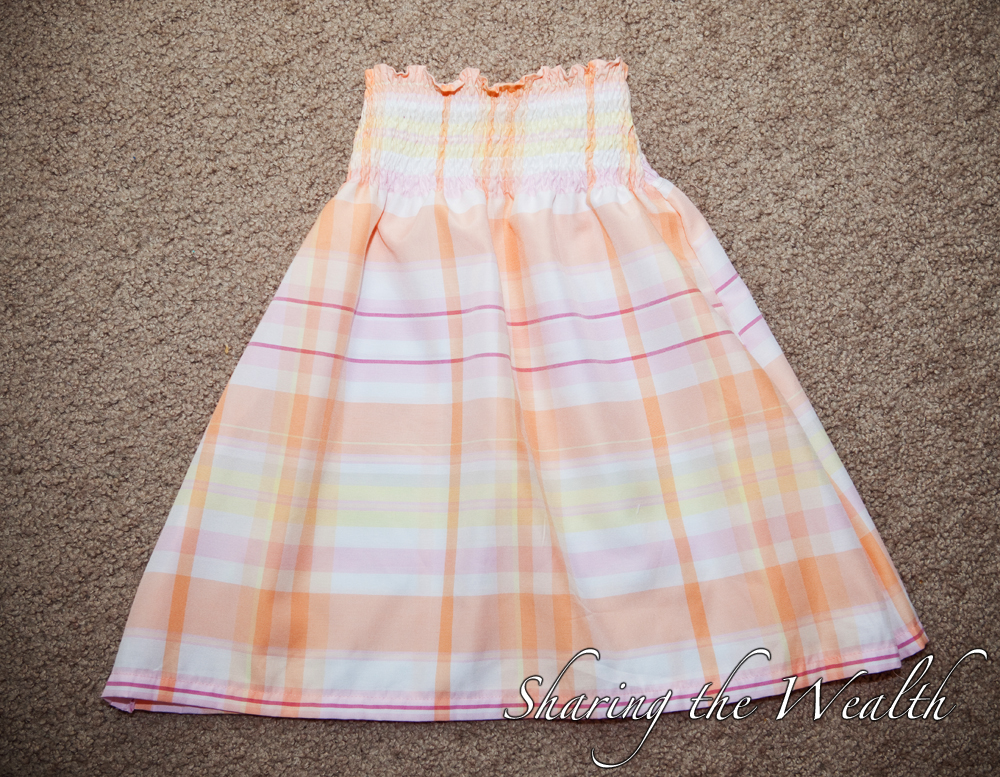
 I sewed several rows with the elastic thread (only the bobbin is the elastic thread, you use normal thread on the top).  I then sewed the other side together,  to get this.  I could have made a pretty cute skirt too hu?
 I then added sleeves - since my daughter was down for a nap when I was making this, I wasn't able to measure....and when I tried it on her, the sleeves were too small; her arms only fit in until her elbows haha.
 So I changed the sleeves - which I actually like better and added some little ruffles on the outside.
 The finished product on my darling model.

Sorry I didn't take more step by step pictures.  I was trying to hurry and get it done while she was sleeping.  Please let me know if you have any questions!

Friday, February 25, 2011

Adult Sweater Turned Into A Kids Sweater

Pin It I've been holding on to an American Eagle sweater of mine for a long time even though it shrunk and was way too small for me.  I've nearly thrown it out many times, but just didn't.  Well today was the day that I finally found something to do with my sweater.  I fixed it up so it would fit my daughter.  I must say, she looks much better than me in it :)

Here is the sweater before I cut it up.
 I cut off the sleeves and cut the f front and back apart.  I didn't want to have the AE symbol on the sweater or the big tag in the back.  I cut me made up pattern, shortened and thinned out the sleeves and sewed away.
Here is the finished product.
 And from the back.  She LOVES watching the washing machine.

Sweater Dress

Pin It
My husband recently cleaned out his closet and was about to toss this sweater when I stopped him.  I was so excited to make a sweater dress for my daughter!  I will admit, this sweater was a little challenging to sew just because even if you sew in a straight line, sometimes it looks misshapen, but I love how the dress turned out!
Here is the sweater before I cut it up.
 I cut off the sleeves.
 Using another dress as a reference, I cut the remaining pieces - not shown in this picture is the bottom part of the dress - sorry!
 I sewed a brown ribbon around the dress.  I sewed a couple little pleats on the front and added a zipper to the back so the neck could be like a turtle neck.  Here is the finished product.  Now she just needs a headband to match :)


Publish Post

Sunday, August 29, 2010

Polka-dot Dress

Pin It I made my daughter another little dress out of an old shirt of mine.  Here is the shirt before:

I cut the shirt up:
Added a silky black fabric for the lining and to the bottom of the dress.  I also cut off the extra tie and made arm straps and a black headband. 
The cute model showing off her new outfit:


Tuesday, July 13, 2010

Beach Towel Cover-up

Pin It
I saw a super cute homemade beach towel cover-up on this MADE blog.  Now, just so you know, I didn't plan using the exact same towel as she did, but it was the only towel that matched my swimming suit at Target.

It was super simple - the only pain was having to hand wind the elastic thread on the bobbin for the shirring.  I would definitely suggest making one though.  It's great because your towel stays on you without you having to wrap it or hold it in place - which is great when you have kids to take care of :)  Check out her instructions and if you have any questions let me know!